Dwyane Wade Swears by This One Simple Stretch to Beat Knee Pain
Even “The Flash” had to eventually hit middle age. And for the now-42-year-old NBA legend Dwyane Wade, that means feeling many of the pains usually reserved for the rest of us mortals: His knees ache. His hips, he says, “are not great.” And his hamstrings are tight. Overall, “I’m not that flexible,” Wade says.
But even though Miami’s going to erect a statue in his honor, Wade isn’t satisfied to become one himself: To help stay limber and keep moving, he’s traded in flash for some flow.
“In the past year, I probably haven’t picked up one weight. I’ve been doing yoga,” he says. “I’m trying to focus on my inside. As much as I want the outside of my body to look great, and I want to look amazing in photo shoots…if my insides hurt, I’m not going to get my outer looking great.”
Related: 20 Glute Exercises to Build Your Best Butt
Though he’s dropped the weights for now, he’s kept the heat with hot yoga sessions, performing his daily 70-minute classes in 105- to 115-degree rooms.
“As an athlete, I love the sweat,” he says. “But it’s as challenging mentally as it is physically. It’s 115 degrees, and [hard] getting into these poses that aren’t common for someone 6-foot-4 with all the injuries I’ve had. I’m putting my body in places it’s not comfortable being.”
Working through those uncomfortable positions, though, is how he’s fighting aging to stay active—as a TV host, podcaster, husband, and father—every day. And while he says his workouts are likely to continue to change and evolve, there are a few challenging moves he thinks may stick with him to keep his body feeling great. As part of his partnership with Thorne supplements, Wade spoke with Men’s Journal about these four must-do moves for staying flexible after 40.
Relieve Knee Pain: Chair Pose

zoranm/Getty
Why It Works
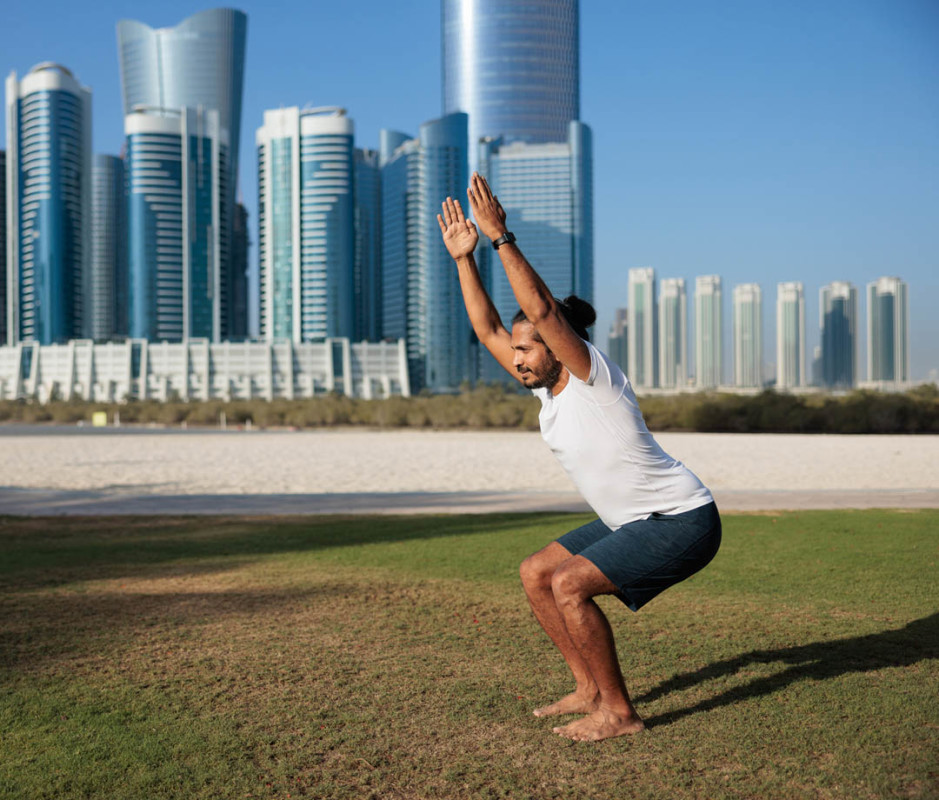
This feet-together squat is notoriously tough to master, and it’s no different for world-beating athletes. Wade says he enjoys the challenging discomfort of this move, but also likes how it helps him address knee issues with his body and mind: “I’m taking the pressure out of my knees, and I’m putting it into my heels.”
How to Do It
- Start in mountain pose: Stand with your feet together, arms at your sides, palms facing in. Spread your toes, press your feet into the mat, and tense your leg muscles. Inhale.
- Exhale, then bend your knees to sit back as if you were sitting into a chair. Try to get your thighs as close to parallel with the floor as possible. Your torso will lean slightly forward, but try to keep a proud chest so your spine remains aligned.
- Keep your shoulder blades pressed against the back of your spine so the caps of your shoulders don’t roll forward. Lift your arms up so your upper arms are in line with your torso and next to your ears.
- Breathe in this position, trying to hold it for 15 to 30 seconds. That’s 1 rep.
- Stand to reset. Rest for 15 to 30 seconds, then perform chair pose again. If your form starts to break down, stand back up to rest. Start with 2 to 3 reps, eventually holding for longer and adding more reps.
Ease Back Pain: Forward Fold With Bent Knees

NicolasMcComber/Getty
Why It Works
Like all other non-superhumans out there, Wade has tight hamstrings. And tight hamstrings can pull on your pelvis, resulting in low back pain and injury.
Instead of focusing on touching your toes with straight legs, forward folding in yoga changes the focus: “How can I keep my forehead connected to my knee as I gain extension [in the hamstrings]?” he asks. The answer is to bend the knees slightly: Instead of straining his hamstrings, this lets him access the stretched position, lengthen his hamstrings, and fend off low back pain.
How to Do It
- Start in mountain pose: Stand with your feet together, arms at your sides, palms facing in. Spread your toes, press your feet into the mat, and tense your leg muscles. Inhale.
- Exhale, then bend your knees slightly, and hinge from the hips to fold forward so your torso goes towards the front of your thighs.
- Bend your knees as much as you need to in order to bring your hands down to hold your big toes or to place your hands next to your feet.
- Breathe in and out in this position, extending your chest to lengthen your spine. Hold this for a few breaths, then slowly stand back up by un-hinging your hips.
- Perform 2 to 4 reps.
Open Hips: Tree Pose

zoranm/Getty
Why It Works
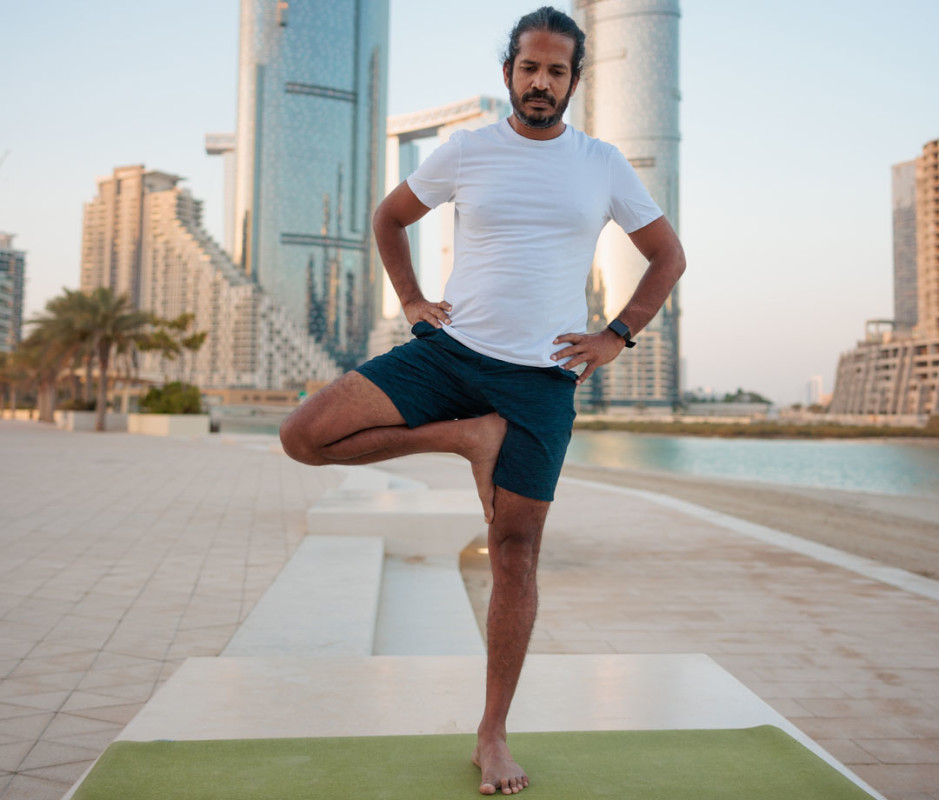
This iconic, standing-on-one-foot pose may look like a balance challenge, but it’s more than that, the Heat legend says. Lifting his leg to bring his foot onto the inside of his other thigh helps open his tight hips. If you sit a lot, chances are that your hips are tight and closed. And like tight hamstrings, this can result in lumbar back pain.
How to Do It
- Start in mountain pose: Stand with your feet together, arms at your sides, palms facing in. Spread your toes, press your feet into the mat, and tense your leg muscles. Inhale.
- Exhale, then place your hands on your hips. Raise your right leg and place the bottom of your foot on the inside of your left thigh. Don’t place it on your knee. (If you can’t get that high, place the foot on the side of your shin instead.)
- Square your shoulders and hips to the front. Press your right foot and left leg together. If you feel balanced, reach your hands overhead.
- Breathe in this position for a few breaths. Return to mountain, and repeat tree pose on the other side.
- Start by performing 2 tree poses on each side. Eventually, hold the pose longer and add more reps.
Improve Spinal Rotation: Low Lunge Twist

James Michelfelder and Therese Sommerseth
Why It Works
There’s a reason that outside of yoga, this is called “the world’s greatest stretch.”
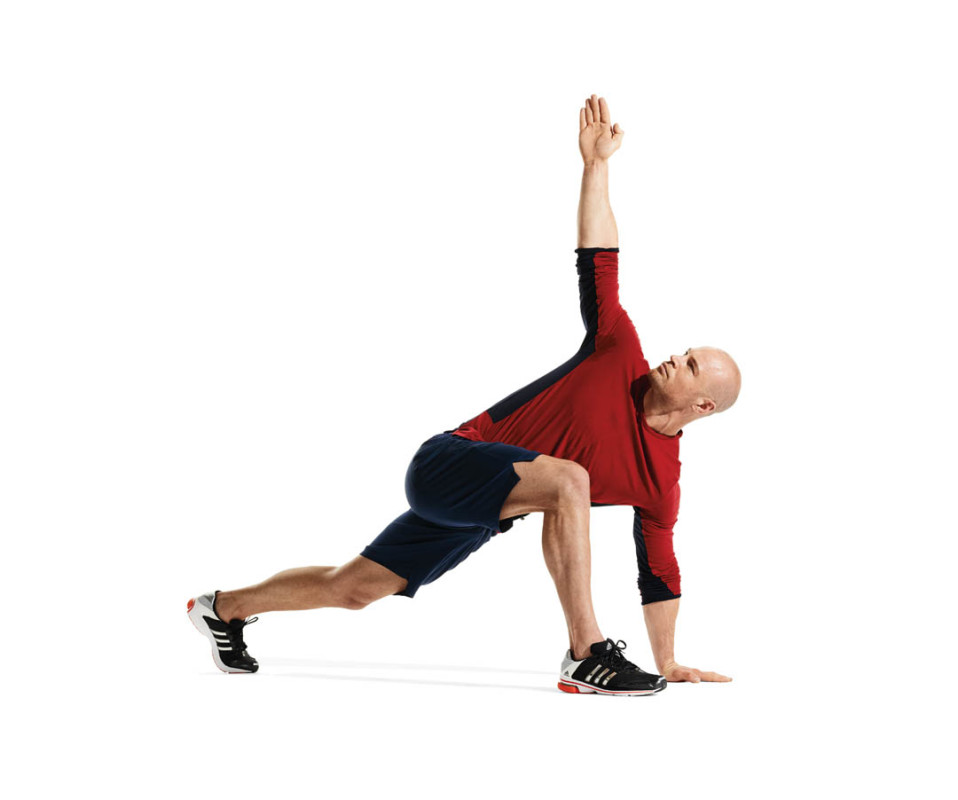
“I’m challenging myself not only in the upper body, but the lower body,” he says, because this body stretches his hamstrings, opens his hips, and asks the Hall of Famer to twist the middle of his back—called the thoracic spine—more than he normally would.
And that’s good: When your thoracic spine can’t twist, your body compensates by twisting in the low back instead which can lead to pain and injury. Studies have found that increasing the mobility of the thoracic spine can reduce low back pain. This pose is also a great warmup before a lifting or running workout.
How to Do It
- Begin in the top of a traditional pushup position, with your hands directly below your shoulders, and your body forming a straight line from head to heels.
- Bring your right foot up to, and outside of, your right hand. Drop your left knee to the ground, if needed.
- Keep your left hand planted firmly on the ground. Lift your right and twist your torso so your right hand goes towards the ceiling and your torso and arms form a capital “T” shape. Gaze up at your top hand. Hold this for an exhale, then twist back down.
- Return to the pushup position and do the stretch on the other side.
- Start with four rounds of this pose on each side, and increase over time, aiming for eight rounds

